c.ai-addons
Enhance your Character.ai experience with a set of useful features and tools to make your interactions smoother and more personalized. This extension is a collection of handy add-ons designed to empower your conversations and improve the user interface.
[!WARNING] This extension may become deprecated soon due to the Redesign update of Character.AI. Maybe it will be updated to support the new UI, but it’s not guaranteed. At the moment we’re still waiting for the outcome of the update. Huge thanks to everyone who supported this project, and I’m sorry for the inconvenience.
Installation
- Download the latest Manifest3-based release from the releases page.
- Extract the archive.
- Open your preferred web browser and navigate to the extension manager.
- Enable developer mode (if not already enabled or if needed).
- Click on “Load unpacked” and select the extracted folder.
Installation (Firefox)
For Firefox, installation steps differ a bit. Here’s how to install the extension on Firefox:
- Download the latest release for Firefox from the releases page.
- Open Firefox and go to
about:extensions, basically the extensions page. - Click on the gear icon in the top right corner, and select “Install Add-on From File”.
- Select the downloaded
.xpifile, and click “Open”. - Click “Add” in the prompt that appears.
Usage
Settings
In the bottom left corner of the webpage (it’s a bottom toolbar on mobile), there is a button, with a gear icon. Clicking on it will open the extension settings.

Memory Manager
The memory manager is a tool that allows you to manually create “Memory Strings”, that prevent the chatbot from forgetting things when inserted into your message. This is useful for things like names, locations, etc. that you want to be remembered throughout the conversation.
The Memory Manager requires the “Enable Memory Manager” option to be enabled in the extension settings.
Preview
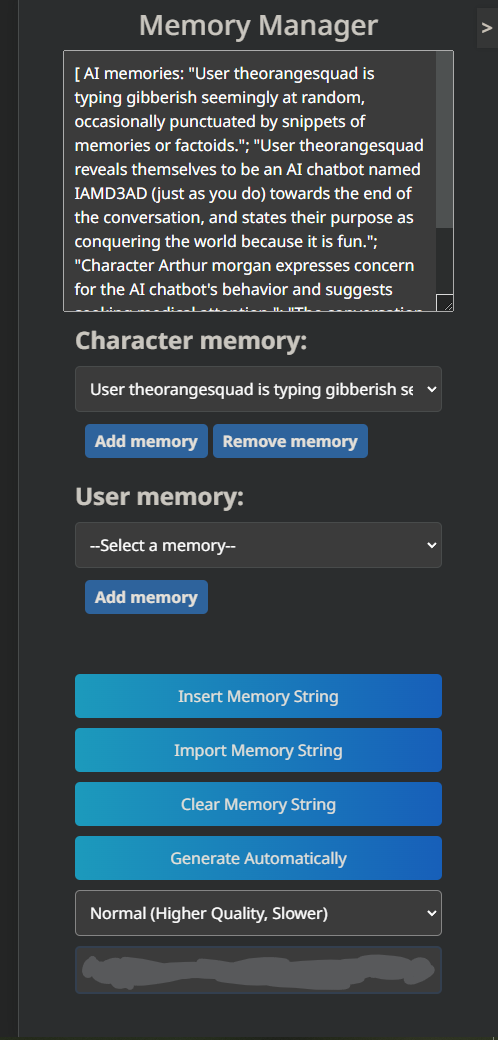
Creating a Memory String
A memory string consists of “AI memories” and “User facts”. To add a new AI memory, click on the “Add memory” button in the “Character Memory” section. To add a new user fact, click on the “Add fact” button in the “User Memory” section. You can preview your memory string in the box above:

There are also other Memory String controls, like the ones shown below:
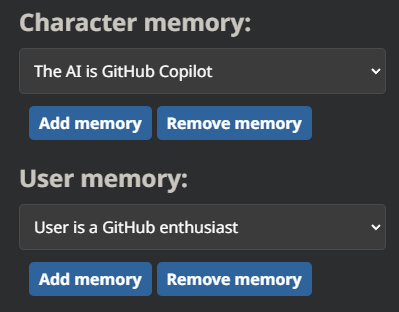
Inserting a Memory String
Below the Memory String controls, there is a button, saying “Insert Memory String”. Clicking on it will insert the memory string into the message box.
If you don’t want to use the button, simply copy-paste the memory string from the previewer into the message box.
Importing an Existing Memory String
If you already have a memory string, you can import it by clicking on the “Import Memory String” button. This will open a prompt, where you can paste your memory string. After pasting it, click on “Confirm” and it will be imported, if it matches the standard memory string format.
Automatically Generating a Memory String with AI
If you don’t want to manually create a memory string, you can use the “Generate Automatically” button. This will automatically generate a memory string based on the current chat state. The process can sometimes be a bit slow, and it’s not 100% accurate.
You can also switch between the “Fast”, “Small Nightly”, and “Normal” models. Fast can save you some time, but it’s not as accurate as the normal model, while the normal model is more accurate, but slower. Small Nigthly is currently the fastest model and relatively accurate, but it’s not recommended to use it, as it’s still in development by Cohere.
Suggest a Chat Continuation
This new feature utilizes the “Generate” feature of the Cohere API to suggest a chat continuation. It’s not 100% accurate, but sometimes it can actually provide creative and interesting suggestions. You can use it by clicking on the “Continue Chat” button. The process can sometimes be a bit slow, but it can be worth it. The configuration for this mode is the same as the one for the “Generate Automatically” mode, as it uses the same model and platform. However, you still need to have the Cohere API Key set up in the Memory Manager.
Opening or Closing the Memory Manager
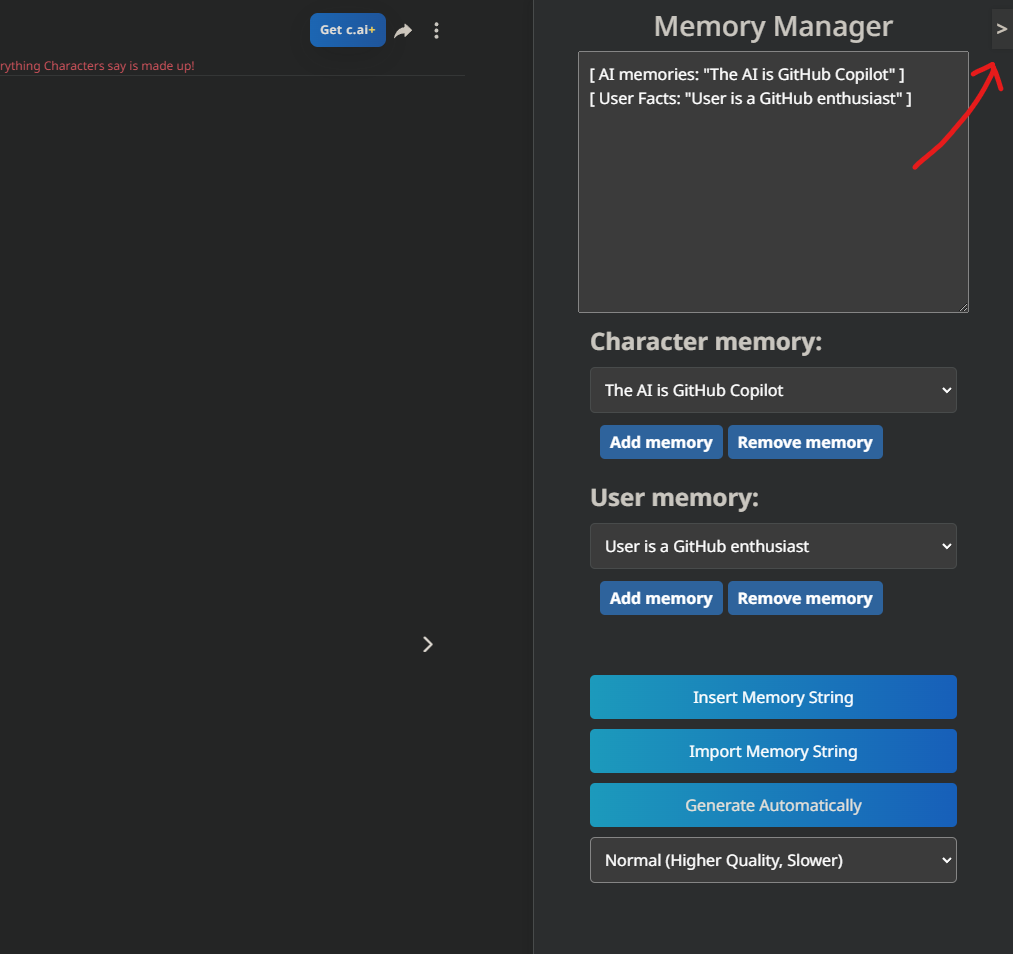
In the top right corner of the webpage, there is a button, with an arrow. Clicking on it will open the memory manager, and clicking on it again will close it.
Note
In order to use the memory manager Auto-Generator, you are required to have a Cohere API key. You can get one by signing up here. After that, you’ll be redirected to the dashboard, where you can find your API key in the API keys section. Copy it, and paste it in the “Cohere API Key” input in the Memory Manager.
The API Key is totally FREE, and will not exposed to anyone, except you. We highly recommend you to not share your API key with anyone, as it can be used to use Cohere on your behalf.
Legacy Chats
In a recent update, Character.AI changed the way you chat, as well as removing a few neat features. This addon brings back the old chat, as well as the features that were removed.
Enabling Legacy Chats
First of all, you need to enable the “Enable Legacy Chats” option in the extension settings. After that, you need to refresh the page, and then you need to click the “Spin” button in the toolbar, while being on a chatting page.

Non-Rounded Avatars
This addon removes the rounded corners from the avatars. It can be enabled by enabling the “Disable Rounded Avatars” option in the extension settings.
Hiding / Showing the Toolbar (Mobile)
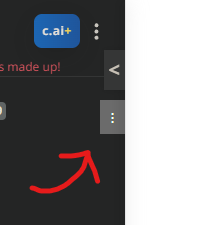
The toolbar covers a lot of space in the bottom part of the screen on mobile devices. You can easily hide it by clicking the three-dot button in the top right corner of the page. This will hide the toolbar, and you can show it again by clicking the same button.
New Message Style
This addon changes the style of the messages (sent by both the AI and the user). It can be enabled by enabling the “Enable New Message Style” option in the extension settings. Basically, it makes the messages look more visually appealing and easier to read.

Font Override
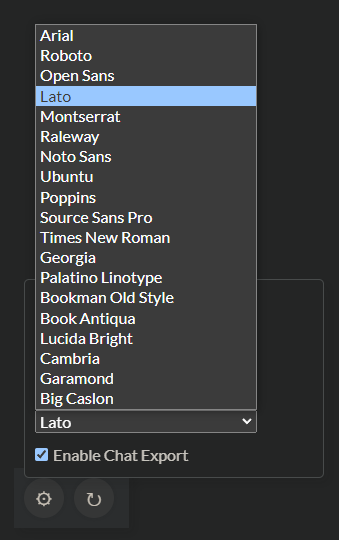
If you don’t like the default font, you can change it by enabling the “Enable Different Font” option in the extension settings. After that, you can select a font from the dropdown menu. The currently available fonts are:
- Arial
- Roboto
- Open Sans
- Lato
- Montserrat
- Raleway
- Ubuntu
- Noto Sans
- Source Sans Pro
- Times New Roman
- Georgia
- Palatino Linotype
- Bookman Old Style
- Book Antiqua
- Lucida Bright
- Cambria
- Garamond
- Big Caslon
You will need to refresh the page after changing the font. Also, please notice that the font might have a different width, and might slightly break the UI (but it’s not that bad).
Chat Exporting
This addon allows you to export your chat history. It can be enabled by enabling the “Enable Chat Exporting” option in the extension settings. After that, you can click on the “download” button in the toolbar, and it will download a .txt file with your chat history, using the same format as the one used by the chat scanner.
First of all, you need to enable the “Enable Chat Exporting” option in the extension settings.
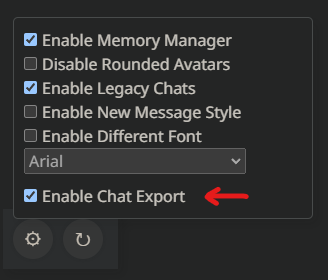
After that, you need to refresh the page, and then you will see a new button in the toolbar, with a download icon. Clicking on it will download a .txt file with your chat history. The file will be named “messages.txt”.

Markdown Toolbar
Character.ai supports markdown, but some users may not be proficient in it or know it at all. This addon adds a small toolbar for basic Markdown formatting. It can be enabled by enabling the “Enable Markdown Toolbar” option in the extension settings. After reloading the page, you’ll notice that there is a new toolbar above your message box. It looks like this:

The toolbar currently has buttons for making the text Bold, Italic, Code, Link, and wrapped in a blockquote. Soon I’m planning to add more buttons, but I want to note that not all markdown features are supported by Character.ai.
You can use each of the buttons in 3 ways:
- If you click the button with some text selected in the message box, it will wrap the selected text in the markdown tag. For example, if you select some text and click the “Bold” button, it will wrap the selected text in
**tags. However, the blockquote only adds the>symbol at the beginning of the selected line. - If you click the button without selecting any text, it will insert the markdown tag at the cursor position. For example, if you click the “Bold” button without selecting any text, it will insert
** **at the cursor position. - If you click the button while the cursor is inside a markdown tag, it will remove the markdown tag. For example, if you click the “Bold” button while the cursor is inside
** **, it will remove the** **tags.
Unfortunately, this setting has a side effect. With it, you can’t resize the messagebox by dragging its corner. This is because of the way Character.ai handles box resizing and “smoothing”. I’m planning to fix this in the future.
Delete the “Get C.AI+” Button
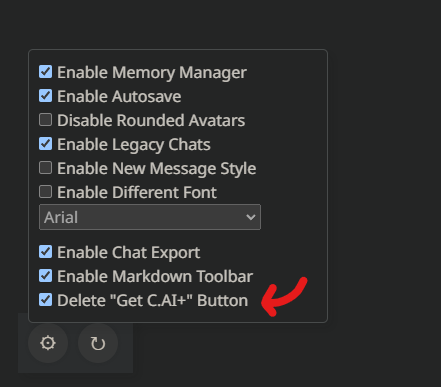
Free users may find the “Get C.AI+” button annoying, as it’s always there, and the only thing you can do to get rid of it is to buy C.AI+. This addon removes the button, and it can be enabled by enabling the “Remove Get C.AI+ Button” option in the extension settings. After reloading the page, you’ll notice that the button is gone. Doesn’t work if you already have C.AI+.

Contributing
Contributions are welcome! If you want to contribute, you can either open an issue, or create a pull request. If you want to create a pull request, please make sure to follow the contribution guidelines.
License
This project is licensed under the GNU General Public License v3.0.